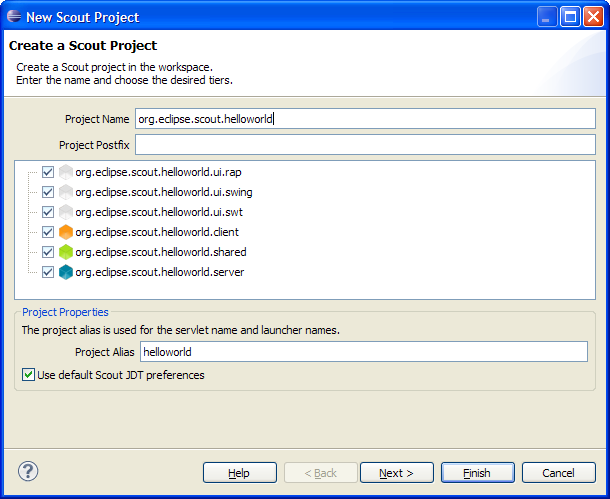
Figure 2.1: Create a new Scout project using the Scout SDK perspective.
The ”Hello World” chapter walks you through the creation of an Eclipse Scout client server application. When the user starts the client part of this application, the client connects to the server1 and asks for some text content that is to be displayed to the user. Next, the server retrieves the desired information and sends it back to the client. The client then copies the content obtained from the server into a text field widget. Finally, the client displays the message obtained from the server in a text field widget.
The goal of this chapter is to provide a first impression of working with the Scout framework using the Scout SDK. We will start by building the application from scratch and then we’ll deploy the complete application to a Tomcat web server. Except for a single line of code in the server part of the ”Hello World” application, we will only be using the tooling provided by the Scout SDK.
Based on this simple ”Hello World” applications a large number of Scout concepts can be illustrated. Rather than including this background material in this tutorial, such information is provided separately in Chapter 3. This tutorial is also available in the Scout wiki2 .
Before you can start with the ”Hello World” example you need to have a complete and working Scout installation. For this, see the step-by-step installation guide provided in Appendix B. Once you have everything installed, you are ready to create your first Scout project.
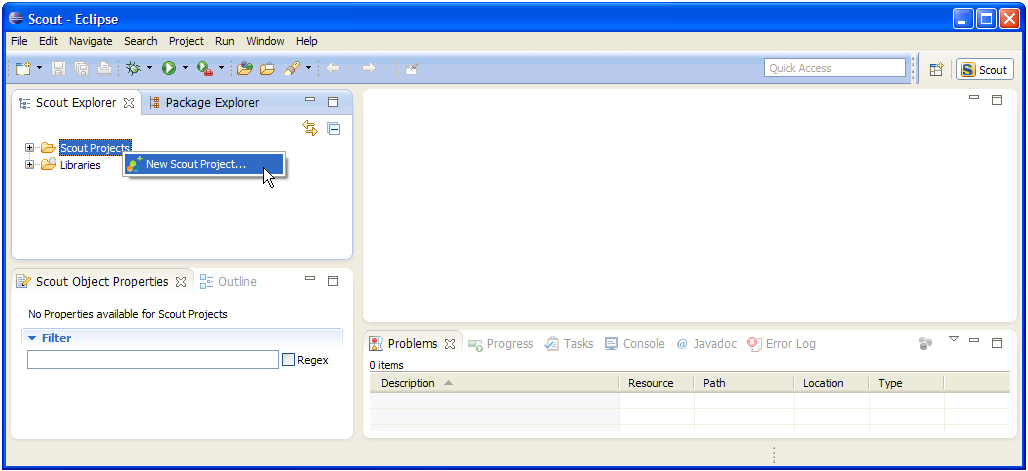
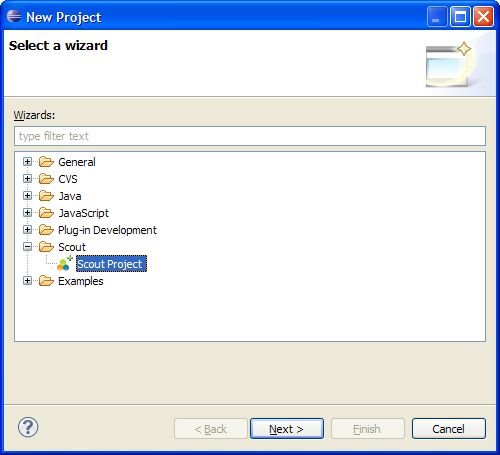
Start your Eclipse IDE and select an empty directory for your workspace. This workspace directory will then hold all the project code for the ”Hello World” application. In the started Eclipse IDE, you can then create a new Scout project by selecting the New Scout Project... context menu as shown in Figure 2.1. Alternatively, you can also use the Eclipse File—New—Project... menu. In this case you are shown the generic New Project wizard of Eclipse where you can select the Scout Project wizard below the Scout folder as seen in Figure 2.2. With the Next button you will be directed to the next dialog step, the New Scout Project wizard.
In the New Scout Project wizard enter a name for you Scout project. As we are creating a ”Hello World” application, use org.eclipsescout.helloworld for the Project Name field. Now, click the Finish button to let the Scout SDK create the initial project code for you.
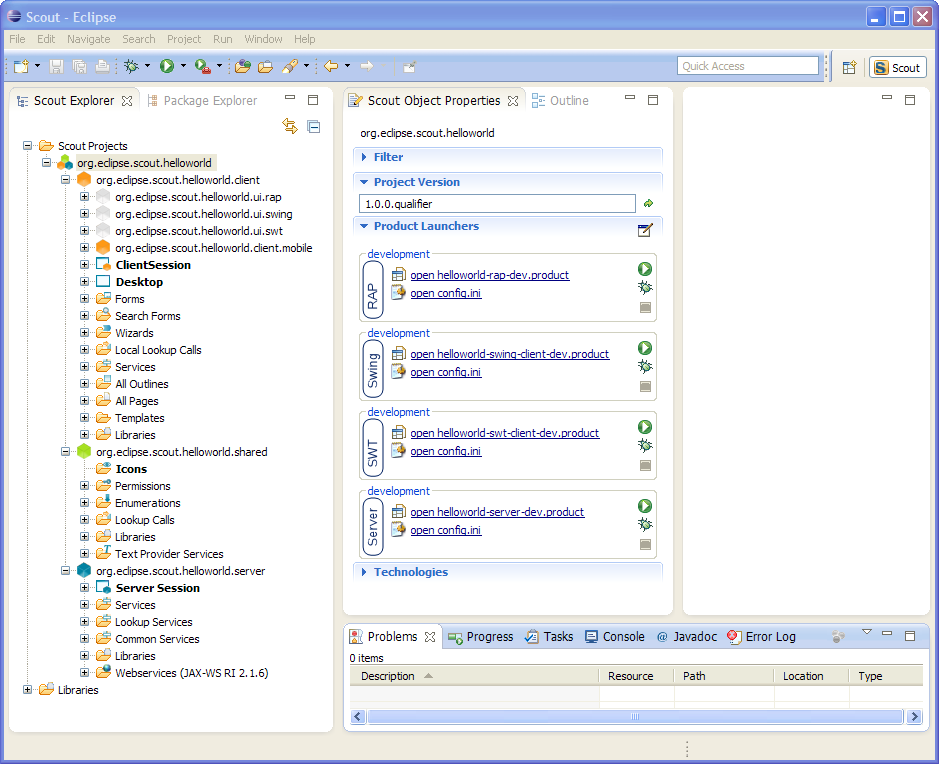
Once the initial project code is built, the Scout SDK displays the application model in the Scout Explorer. This model is visually presented as a tree structure covering both the client and the server part of the application. In Figure 2.3 the Scout Explorer displays the top level elements of the complete Scout application.
After the initial project creation step we are ready to start the server and the clients of the still empty Scout application. For this, we switch to the Scout Explorer and select the root node org.eclipse.scout.helloworld. Selecting the application’s org.eclipse.scout.helloworld node in the Scout Explorer displays the product launchers in the Scout Object Properties. As we can see in Figure 2.4, we have product launchers for four different development products.
| RAP | The RAP server application for web and mobile clients |
| Swing | The Scout Swing desktop client application |
| SWT | The Scout SWT desktop client application |
| Server | The Scout server application |
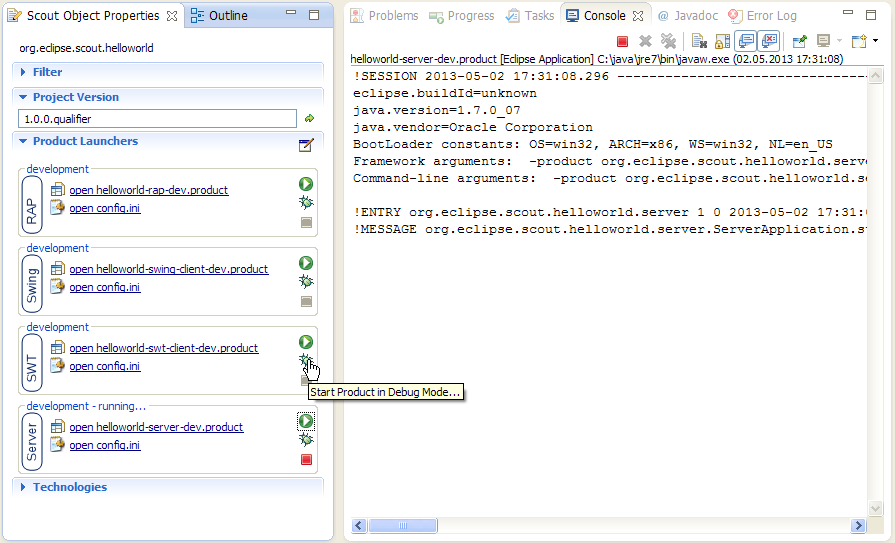
Each product launcher box provides a link to the corresponding Eclipse product file3 , the configuration file4 , as well as three launcher icons to start and stop the corresponding application. The green Circle icon starts the product in normal mode. The Bug icon just below, starts a product in debug mode. To terminate a running product, the red Square icon is provided. Alternatively, you can also stop products by clicking on the same red icon in the console view. This is shown on the right hand side of Figure 2.4. Client products may also be stopped by closing the client’s main window or using the provided File—Exit menu.
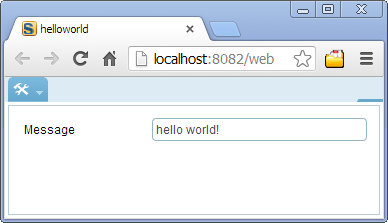
Before any of the client products is started, we need to start the server product using the green circle or the bug launcher icon. During startup of the Scout server you should see console output similar to the one shown on the right hand side of Figure 2.4. Once the server is running, you may start the SWT client as shown in Figure 2.4, the Swing client, and the RAP server in the same way. With a running RAP product, you may also display the Scout client in a web browser. Just type the address http://localhost:8082/web into the browser’s navigation bar.
![]()
![]()
![]()
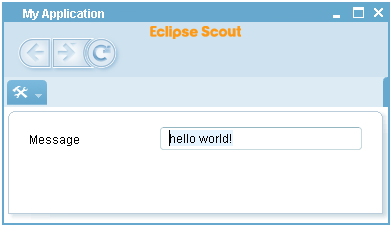
Having started the Scout server and all client products, the client applications should become visible as shown in Figure 2.5.
In this section we will define the user interface (UI) model for the ”Hello World” application. More specifically, we add a text field widget to the client’s empty desktop form of the ”Hello World” application. In the steps described below, we use the New Form Field wizard provided by the Scout SDK. First, we add a group box field to the desktop form. Then, we apply this wizard a second time to add the actual text widget5 .
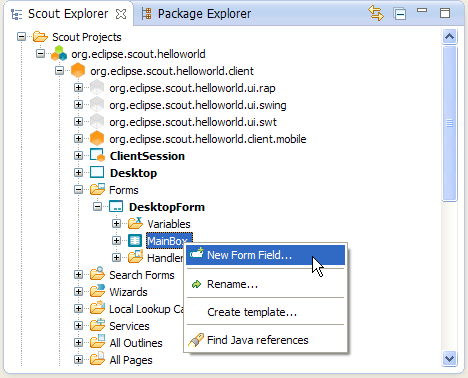
To add any widgets to the desktop form we first need to navigate to the DesktopForm in the Scout Explorer. By clicking on the small plus icon on the left hand side of the DesktopForm this element is expanded and the MainBox element becomes visible below. With a click of the right mouse button over the MainBox, the available context menus are displayed. To start the form field wizard we select the New Form Field ... menu as shown in Figure 2.6.
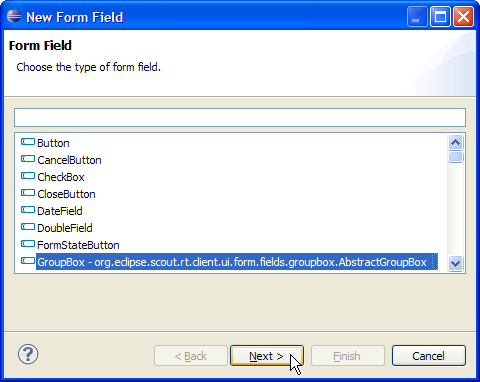
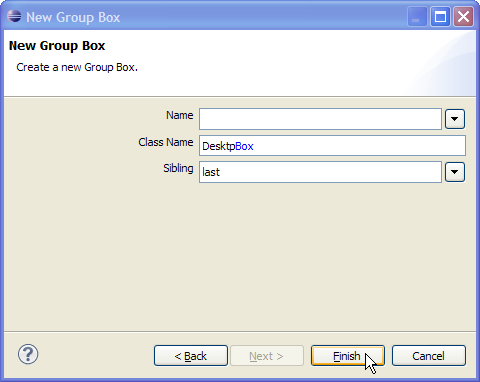
In the first dialog of the form field wizard shown on the left side of Figure 2.7, we choose the form field type. To select the desired field type, we either select the desired type with the mouse or use the search field to filter the list of available field types. In the second wizard dialog, we do not provide a label for the group box in the Name field. As we have only a single group box in the ”Hello World” desktop form we omit the name and enter ’Desktop’ into the Class Name field before we close the wizard with the Finish button. This step is shown on the right side of Figure 2.7. The Scout SDK will add the necessary Java code for the DesktopBox in the background.
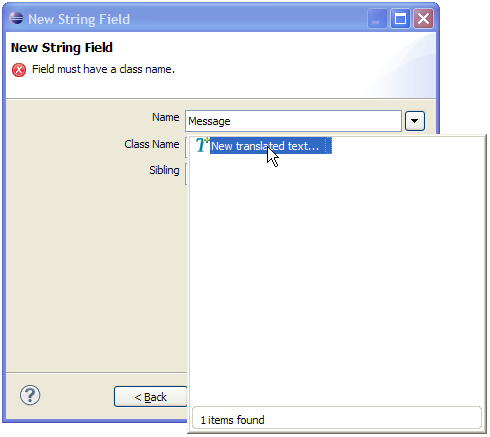
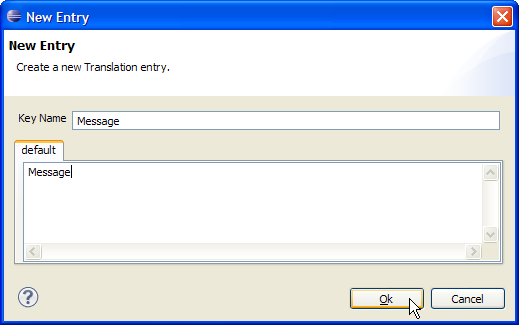
To add the text field widget to the group box just created, we navigate to the corresponding DesktopBox in the Scout Explorer. For this, we click on the small plus icon on the left hand side of the MainBox to expand this node and make the DesktopBox element visible. On DesktopBox we again use the New Form Field ... menu. In the first wizard dialog, we select StringField using ’st’ as a search criteria and click the Next button to open the second wizard dialog. In the second wizard dialog, we enter ’Message’ into the Name field. As we do not yet have the text ’Message’ available in our ”Hello World” application the wizard prompts the user with the proposal New Translated Text .... Selecting the provided option we can add a new text entry as shown in Figure 2.8. Once we have provided some initial translation for our message label, we can close the translation dialog with the Ok button. Finally, we close the form field wizard using the Finish button.
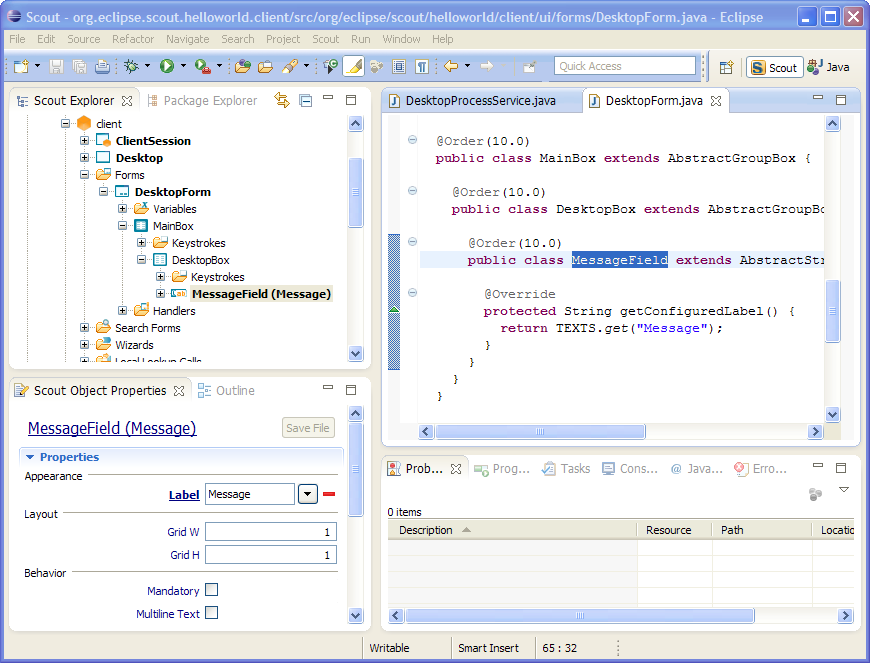
By expanding the DesktopBox element in the Scout Explorer, the new message field becomes visible. A double click on the message field element then loads the corresponding Java code into an Editor as shown in Figure 2.9. If you are following this tutorial with your own Eclipse Scout installation compare your status with this screenshot. Make sure that the project structure in the Scout Explorer looks as shown in Figure 2.9 and a double click to the MessageField both loads the corresponding Java code and displays the message field’s properties in the Scout Object Properties.
Having verified your status of the ”Hello World” application you can start the application as described in Section 2.3. The client applications will then display your message widget. However, the text widget is still empty, as we did not yet load any initial content into it. This is the topic of the next section where we continue the tutorial with the server part.
The responsibility of the server part in our ”Hello World” application is to provide an initial text content for the message field in the client’s user interface. We implement this behaviour in the load method of the server’s DesktopService. An empty stub for the load method and the DesktopService service have already been created during the initial project creation step described in Section 2.2. The DesktopService represents the server service corresponding to the DesktopForm on the client side. This initial setup represents Scout’s standard form processing mechanism where client forms and server services typically come in pairs.
Whenever the client’s user interface displays a form to the user, the client connects to the server and calls the load method of the corresponding server service. We can now add the business logic to the load method of the server’s DesktopService to implement the desired behaviour. And this is the last missing piece to complete the ”Hello World” application.
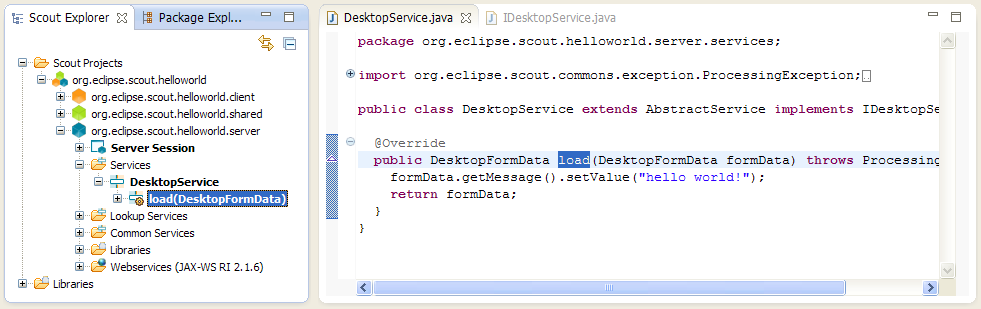
To navigate to the implementation of the desktop service in the Scout SDK, we first expand the blue top-level server node in the Scout Explorer. Below the server node, we then expand the Services folder which shows the DesktopService element. Expanding this DesktopService node, the load method becomes visible as shown in Figure 2.10.
According to the signature of the load method, a formData object is passed into this method that is then handed back in the return statement. To complete the implementation of the load method it is sufficient to assign the text ’hello world!’ to the message field part of the form data. The only line of Java code we write in our ”Hello World” application is printed below. For the complete implementation of the load method see Listing 2.1.
For Eclipse Scout applications a slick look and feel called Rayo is available in the Eclipse Marketplace6 . And in this (optional) part of the ”Hello World” tutorial we will add Rayo to our ”Hello World” Swing client application. As a result, we will get a Scout desktop application that looks the same as the corresponding Scout web client as shown in Figure 2.11.
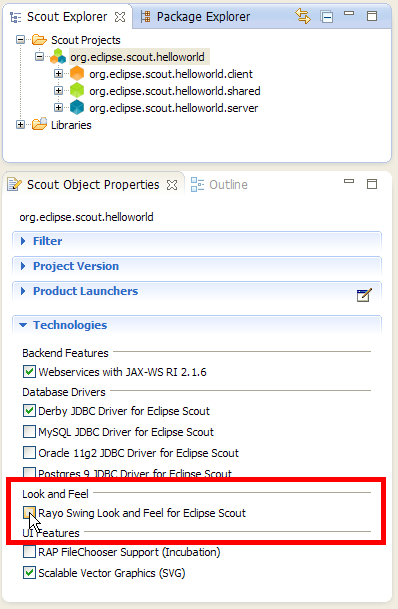
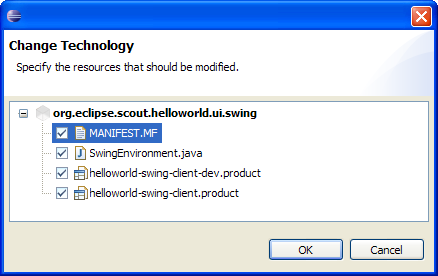
To add Rayo in the Scout SDK to our ”Hello World” project, switch to the Scout Explorer and select the top-level org.eclipse.scout.helloworld node. Then, according to Figure 2.12, select the checkbox Rayo Swing Look and Feel for Eclipse Scout under the Technologies section of the Scout Object Properties. This brings up a dialog showing the proposed changes to the Swing plugin of the ”Hello World” application. These changes need to be confirmed with the OK button. The first time the user adds the Rayo feature in the Scout SDK, Eclipse needs to download the package from the Eclipse Marketplace. This download and subsequent installation of Rayo will make you to go through the following steps.
After the successful download and installation of the Rayo package, start the Swing client using the procedure described in Section 2.3. When we also start the web client of the ”Hello World” application using the RAP product launcher, we can compare the result side by side.
We are now ready to move the finished ”Hello World” application from our development environment to a productive setup. The simplest option to move our application into the ’wild’ is to use the Export Scout Project wizard provided by the Scout SDK. Using the default settings, the export wizard produces two WAR files7 that contain the complete Scout server and the desktop and mobile client applications.
To deploy the application to a web server the WAR files generated by the wizard are the only artefacts needed. The first WAR file contains the Scout server including a zipped desktop client for downloading. In the second WAR file, the RAP server application that provides both the web client and the client for mobile devices.
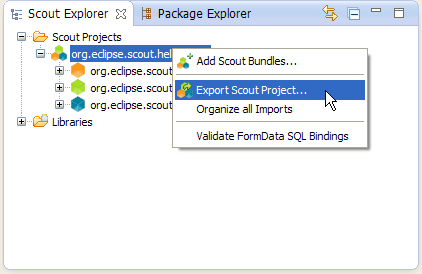
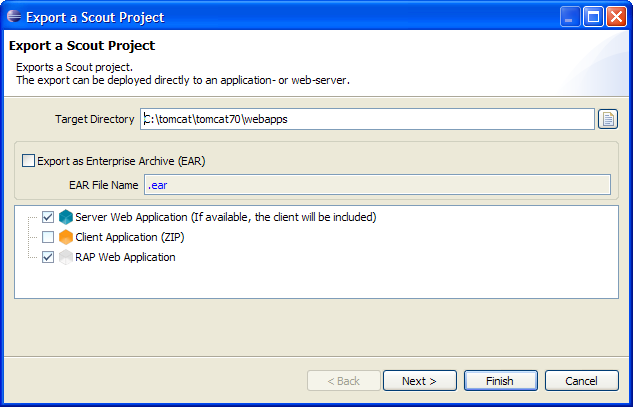
To start the export wizard, we start the Scout SDK with the ”Hello World” Scout project. In the Scout Explorer we then select the corresponding Export Scout Project... context menu on the ”Hello World” top level application node as shown in Figure 2.13. In the first wizard dialog shown in Figure 2.14, the target directory for the WAR files needs to be specified. You may choose any directory as the target directory8 . After clicking Next button the second wizard step proposes the server product file that specifies the artefacts to be exported including the file name for the WAR file for the ”Hello World” server application. Typically, the proposed default values are fine. Move to the third dialog with Next button.
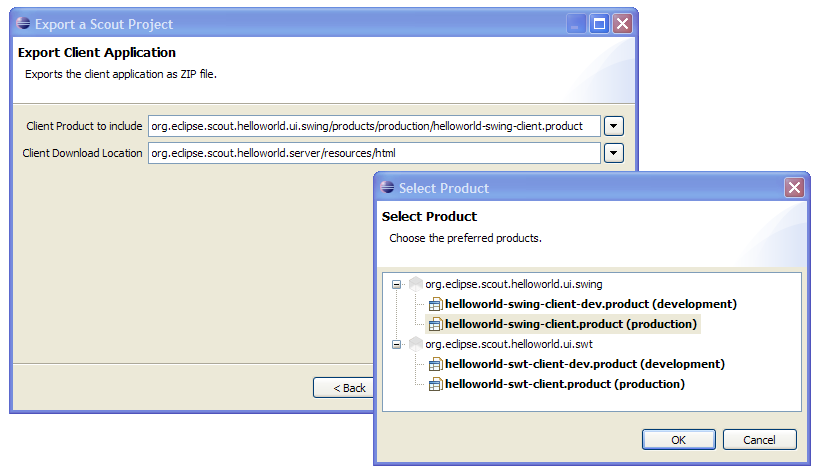
In the third dialog of the Export Scout Project wizard the desktop client to be included in the WAR file needs to be specified. The default selection is set to the SWT client application. For the ”Hello World” example, we want to include the Swing client application with the Rayo Look and Feel. For this, we need to change the selected product to helloworld-swing-client.product (production) according to Figure 2.15. With Next button we move to the last wizard step.
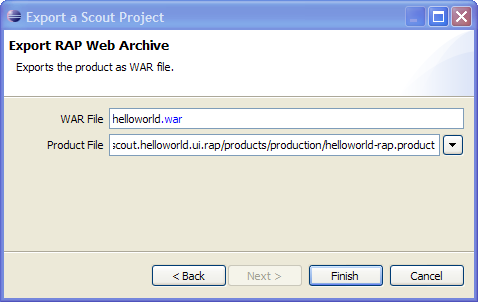
In the last wizard dialog shown in Figure 2.16, the RAP server product and the corresponding WAR file name are specified. Normally, the proposed field values are fine and we can close the wizard with Finish button. After this last step, the Scout SDK is assembling the necessary artefacts and building the two ”Hello World” WAR files. These two WAR files are the only items needed for deploying the ”Hello World” application to a web server
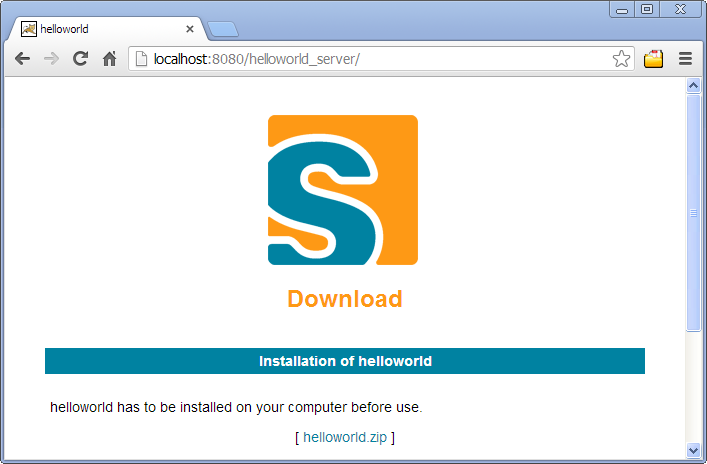
As the final step of this tutorial, we deploy the two WAR files representing our ”Hello World” application to a Tomcat web server. For this, we first need a working Tomcat installation. If you do not yet have such an installation you may want to read and follow the instructions provided in Appendix C. To verify a running Tomcat instance, type http://localhost:8080/ into the address bar of the web browser of your choice. You should then see the page shown in Figure 2.17.
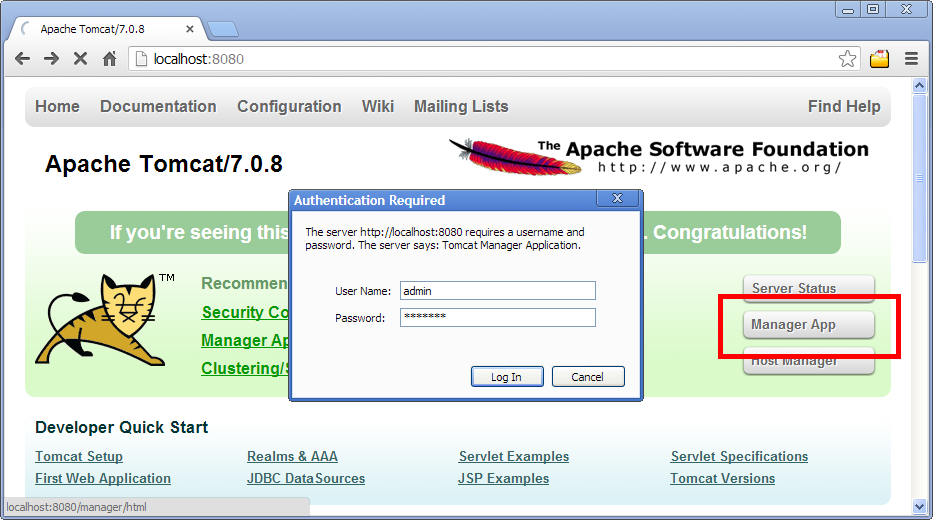
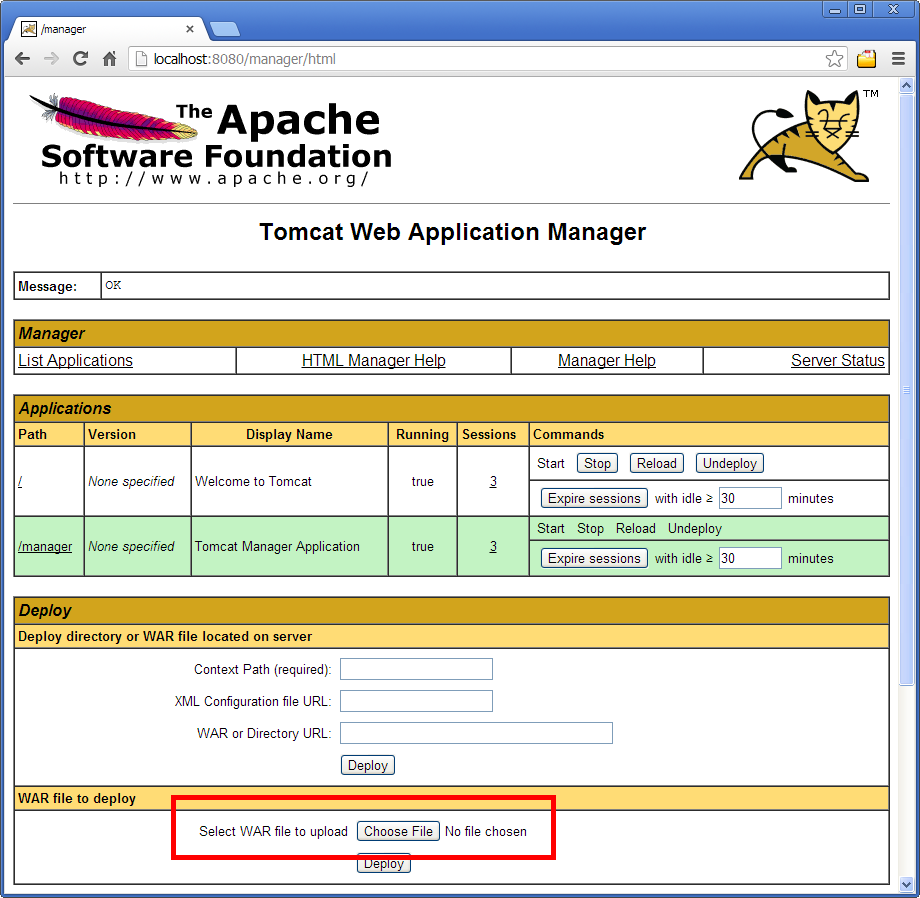
Once the web browser displays the successful running of your Tomcat instance, switch to its ”Manager App” by clicking on the button highlighted in Figure 2.17. After entering user name and password the browser will display the ”Tomcat Web Application Manager” as shown in Figure 2.18. If you don’t know the correct username or password you may look it up in the file tomcat-users.xml as described in Appendix C.2.
After logging successfully into Tomcats manager application, you can select the WAR file(s) to be deployed using button ”Choose File” according to the right hand side of Figure 2.18. After picking your helloworld_server.war and helloworld.war file and closing the file chooser, click on button ”Deploy” (located below button ”Choose File”) to deploy the application to the Tomcat web server. This will copy the selected WAR file into Tomcats webapps directory and unpack its content into a subdirectory with the same name. Deploying the file helloworld.war will extract its contents into a subdirectory named helloworld as shown in Figure ??. Accordingly, the file helloworld_server.war will be extracted into subdirectory helloworld_server. You can now connect to the deployed application using the browser of your choice and enter the following address.
You will then see the home page of the server of your ”Hello World” application shown in Figure 2.19. From here you can download the zipped client application that can be saved in a directory of your choice. After unpacking the zip file, you may start the executable file named helloworld. This will start the ”Hello World” client application as shown on the left hand side of Figure 2.20. To start the ”Hello World” web application, open a browser and enter the following address.
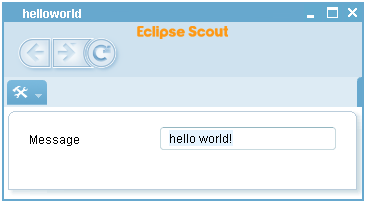
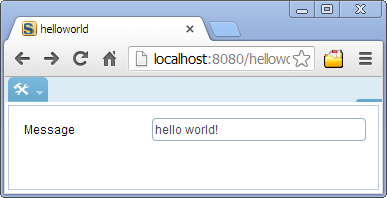
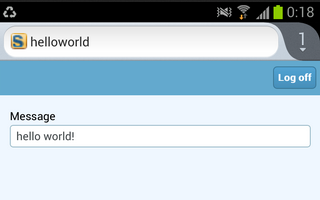
Depending on the device your browser is running on you will be redirected to helloworld/web on a desktop or laptop computer, to helloworld/mobile on a mobile device or to helloworld/mobile if you are connecting from a tablet device. Figure 2.20 shows screenshots for a desktop client, the web application and the same application in a mobile browser. As demonstrated in these screenshots helloworld/web and helloworld/mobile lead to a different presentation of the same UI optimized to the target form factors of desktop browsers, tablets, and mobile phones.