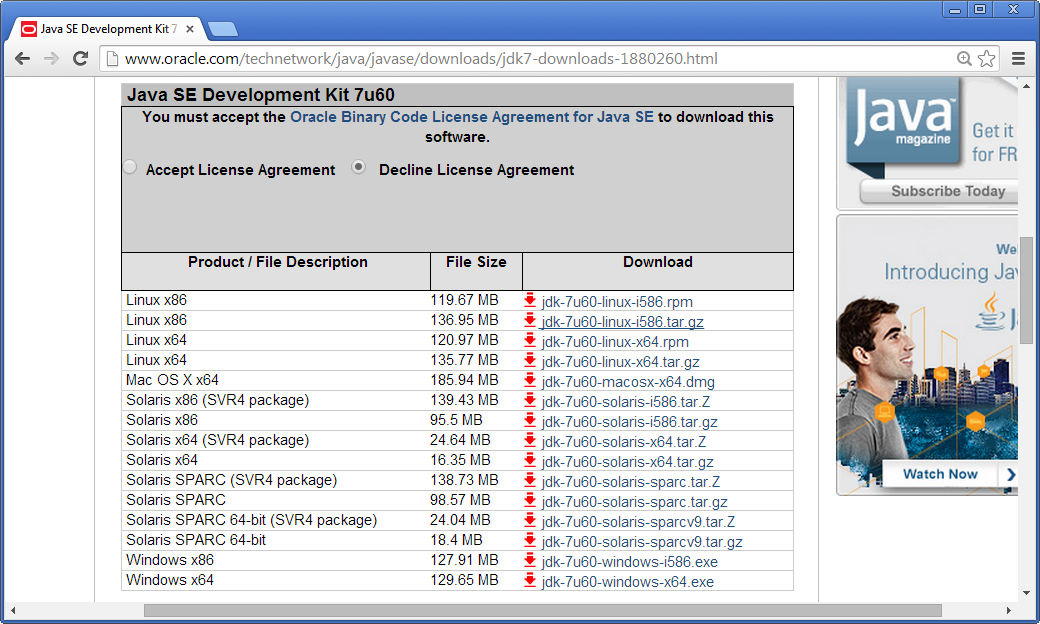
Figure B.1: Installer download for Oracle JDK 7. The Windows 64bit installer package is
highlighted.
This chapter walks you through the installation of Eclipse Scout. The installation description (as well as the rest of this book) is written and tested for Eclipse Scout 4.0 which is delivered as integral part of the Eclipse Luna release train, 2014. Detailed information regarding the scheduling of this release train is provided in the Eclipse wiki1 .
We assume that you have not installed any software relevant for the content of this book. This is why the Scout installation chapter starts with the installation of the Java Development Kit (JDK). Consequently, you will have to skip some of the sections depending on your existing setup.
In the text below, installation routines are described separately for Windows, Mac, and Linux. As Scout applications have been built primarily on the Windows platform in the past, Scout also has the highest maturity level on this platform.
The first step to install Scout is to have an existing and working installation of a JDK version 7 or 8. It is currently recommended to go for the most recent download of Java 7.
Using Scout with Java 8 is possible and has been tested as part of Eclipse release train testing2 . We are currently not aware of any productive installation so far, but this is likely to change in the near future as Oracle’s published end of public updates for Java 7 is scheduled for April 20153 .
You may still use Scout with Java 6. However, this version is no longer tested with Scout and has reached Oracle’s end of public updates on February 2013. Older Java versions will no longer work together with the Scout framework.
Currently, we recommend to install the Oracle JDK 7 together with Scout. Although, using OpenJDK with Scout should work too. To successfully install the JDK you need to have at least local admin rights. You also need to know your hardware architecture in order to download the correct JDK installer.
For Windows, the steps necessary to determine your hardware architecture are described on Microsoft’s support site4 . For Linux several ways to determine if your os is running with 32 or with 64 bits can be found on the web5 For Mac this step is simple, as only a 64 bit package is provided on JDK the download page.
Once you know your hardware architecture, go to Oracle’s official download site6 and accept the licence agreement by clicking on the appropriate radio button. Then, select the Windows x64 package if you are running 64-bit Windows as shown in Figure B.1. If you are running 32-bit Windows, go for the Windows x86 package. It is also recommended to download the Java SE 7 Documentation. The Java API documentation package is available from the official download site7 , located further down under section Additional Resources.
Once you have successfully downloaded the JDK installer, follow the Windows installation guide8 . To verify the installation you might want to go through this Java ”Hello World!” tutorial9 .
Installation instructions for Linux10 and Mac11 are also available from Oracle.
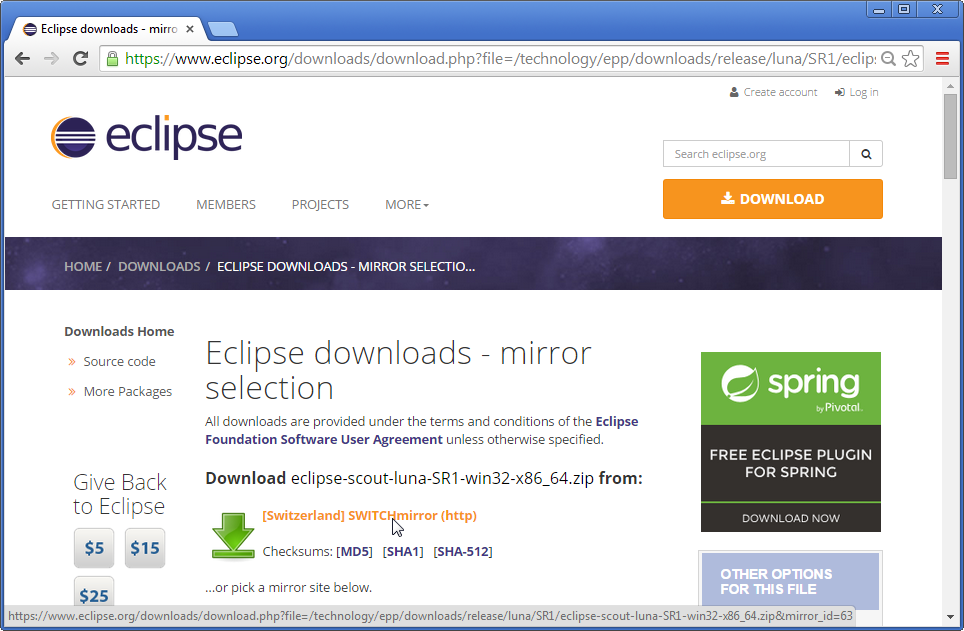
Before you can install Scout make sure that you have a working Java Development Kit (JDK) installation of version 7 or 8. To download the Eclipse Scout package visit the official Eclipse download page as shown in Figure B.2.
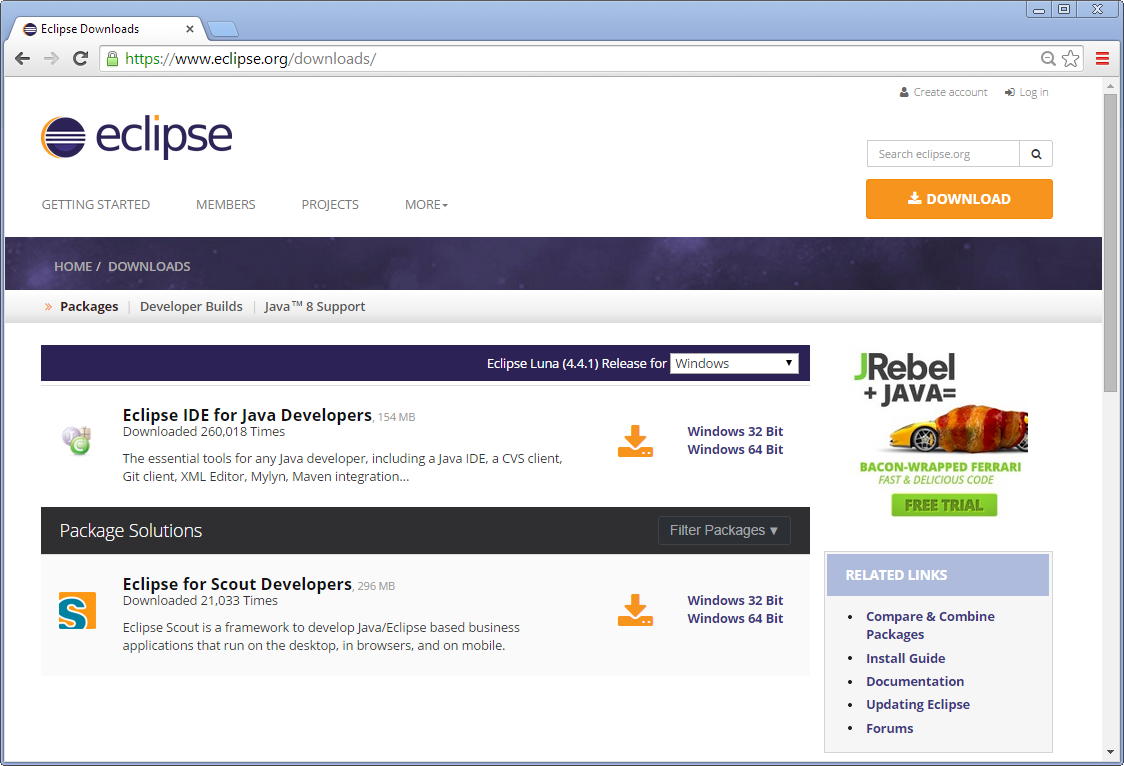
If the download page shows the wrong platform, manually select the correct platform in the dropdown list. As shown in Figure B.2, the Scout package is available as a 32 bit and a 46 bit package. Make sure to pick the package that matches your JDK installation. You can check your installation on the command line as follows.
If the output explicitly mentions the 64 bit installation as shown above, you have a 64 bit installation. Otherwise, you have a 32 bit JDK installed. Now you can select the correct Scout package from the Eclipse download site. After the package selection, confirm the suggested download mirror as shown in Figure B.3.
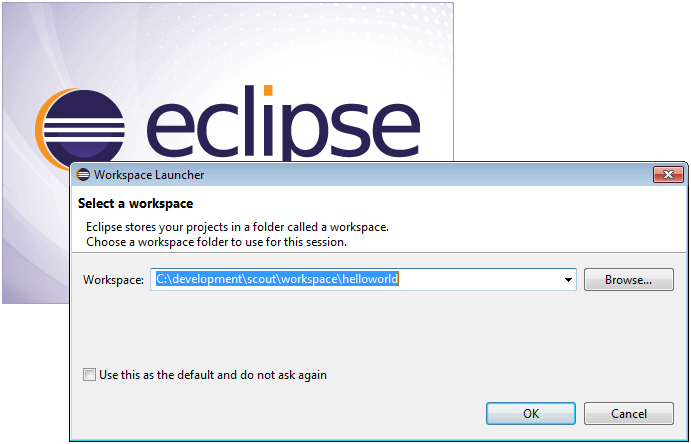
As the Scout package is a simple ZIP (or tar.gz) file, you may unpack its content to a folder of your choice. Inside the eclipse sub-folder, you will then find the Eclipse executable file, such as the eclipse.exe file on a Windows plattform. Starting the Eclipse executable brings up the workspace launcher as shown in Figure B.4.
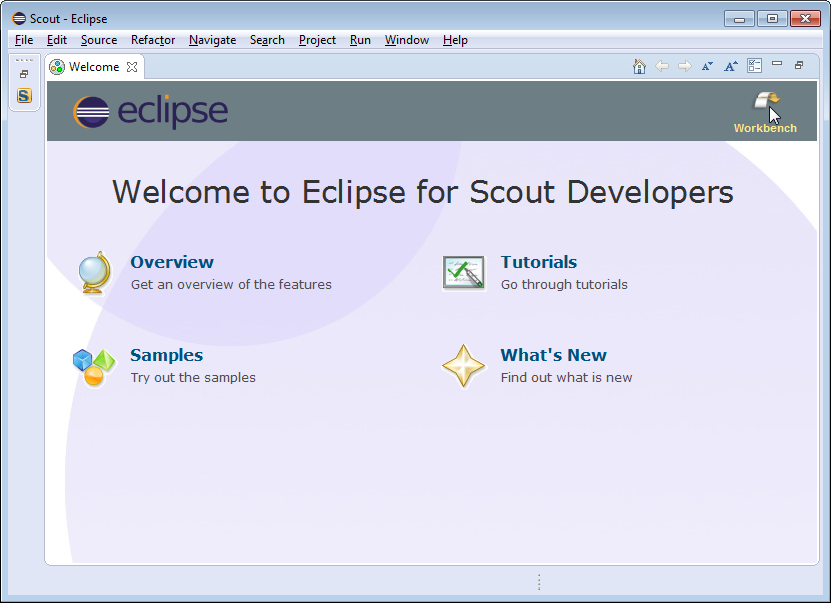
Into the Workspace field you enter an empty target directory for your first Scout project. After clicking the Ok button, the Eclipse IDE creates any directories that do not yet exist and opens the specified workspace. When opening a new workspace for the first time, Eclipse then displays the welcome screen shown in Figure B.5.
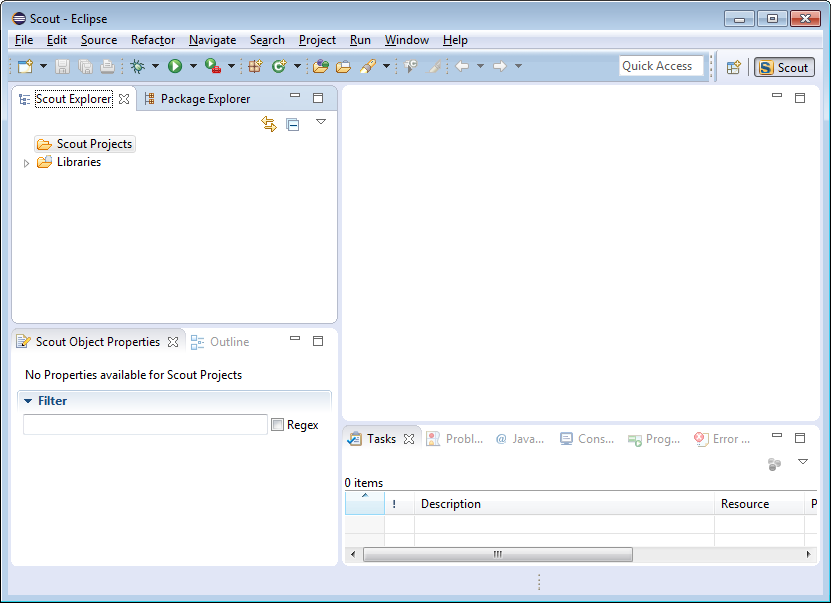
To close the welcome page and open the Scout perspective in the Eclipse IDE click on the Workbench icon. As a result the empty Scout perspective is displayed according to Figure B.6.
Congratulations, you just have successfully completed the Eclipse Scout installation!
If you have only installed a single JDK you will not need to change the default eclipse.ini file of your Eclipse installation. In case you have installed multiple JDKs coming with their individual Java Runtime Environments (JREs), you might want to explicitly specifiy which JRE to use. Open the file eclipse.ini in a editor of your choice and insert the following two lines at the top of the file:
where the second line specifies the exact path to the JRE to be used to start your Eclipse Scout installation.
If you have explicitly specified the JRE to be used you verify this in the running Eclipse installation. Fist, select the Help—About Eclipse menu to open the about dialog. Then, click on the Installation Details button and switch to the Configuration tab. In the long list of system properties you will find lines similar to the ones shown below.
You have now successfully completed the Eclipse Scout installation on your Windows environment. With this running Scout installation you may skip the following section on how to add Scout to an existing Eclipse installation.
This section describes the installation of Scout into an existing Eclipse installation. As the audience of this section is assumed to be familiar with Eclipse, we do not describe how you got your Eclipse installation in the first place. For the provided screenshots we start from the popular package Eclipse IDE for Java EE Developers.
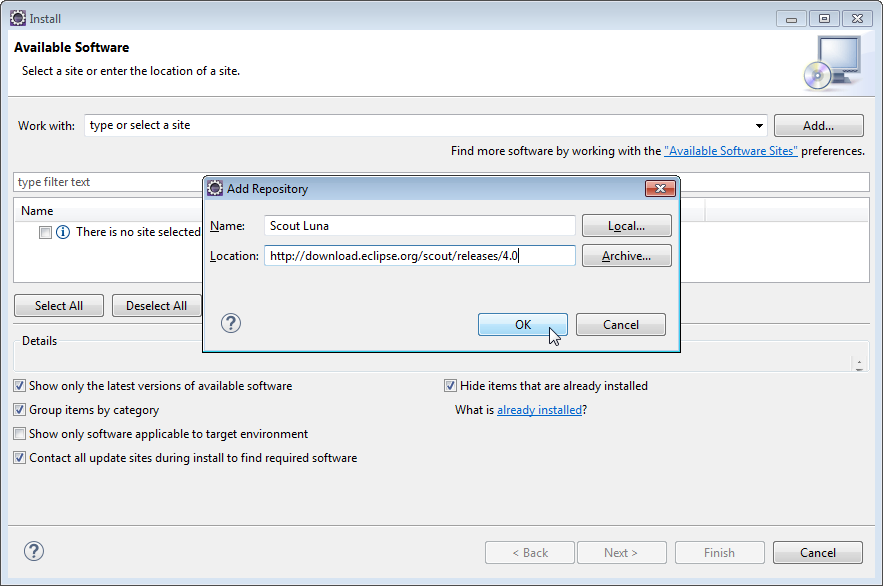
To add Scout to your existing Eclipse installation, you need to start Eclipse. Then select the Help—Install New Software... menu as shown in Figure B.7 to open the install dialog.
In the install dialog, click on the Add... button to enter the link to the Scout repository. This opens the popup dialog Add Repository As shown in Figure B.8, you may use ”Scout Luna” for the Name field. For the Location field enter the Scout release repository as specified below. http://download.eclipse.org/scout/releases/4.0.
After the Eclipse IDE has connected to the Scout repository, select the Scout feature Scout Application Development as shown in Figure B.9. Then, move through the installation with the Next button. On the last installation step, accept the presented EPL terms by clicking on the appropriate radio button. To complete the installation, click the Finish button and accept the request for a restart of Eclipse. After the restart of the Eclipse IDE, you may add the Scout perspective using the Window—Open Perspective—Other ... menu and selecting the Scout perspective from the presented list. Clicking on the Scout perspective button should then result in a state very similar to Figure B.6.
After you can start your Eclipse Scout package you need to verify that Scout is working as intended. The simplest way to verify your Scout installation is to create a ”Hello World” Scout project and run the corresponding Scout application as described in Chapter 2.