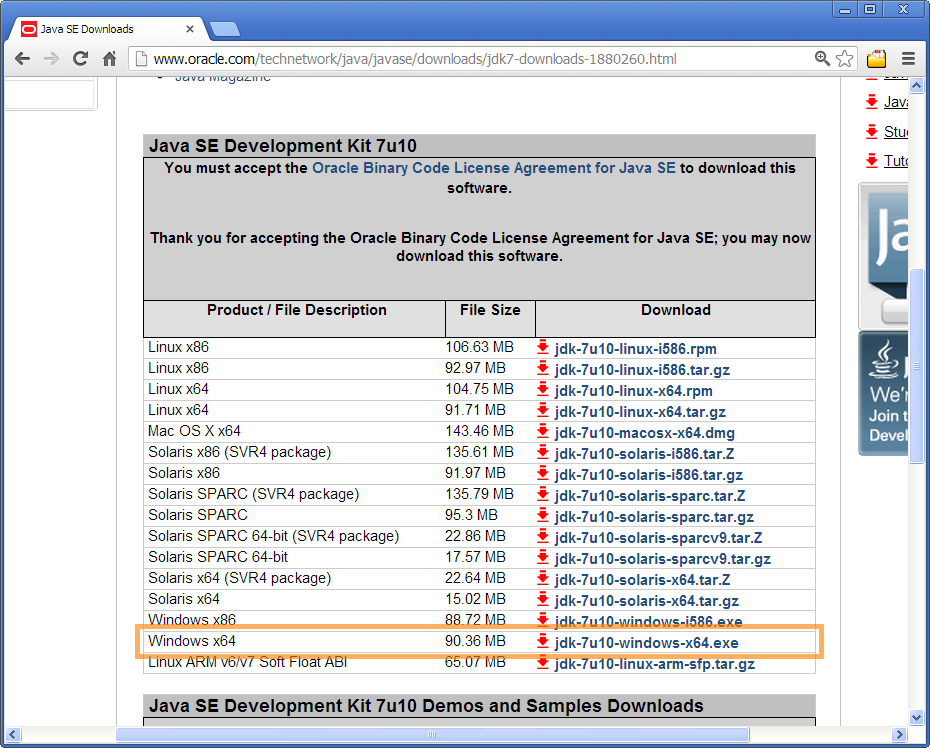
Figure B.1: Installer download for Oracle JDK 7. The Windows 64bit installer package is
highlighted.
This chapter walks you through the installation of Eclipse Scout. The installation description (as well as the rest of this book) is written and tested for Eclipse Scout 3.9. Scout 3.9.0 will be delivered as part of the Eclipse Kepler release train on June 26, 2013. Detailed information regarding the scheduling of the Kepler release train is provided in the Eclipse wiki1 .
We assume that you have not installed any software relevant for the content of this book. This is why the Scout installation chapter starts with the installation of the Java Development Kit (JDK). Consequently, you will have to skip some of the sections depending on your existing setup.
In the text below, installation routines are described separately for Windows, Mac, and Linux. As Scout applications have been built primarily on the Windows platform in the past, Scout also has the highest maturity level on this platform.
The first step to install Scout is to have an existing and working installation of a JDK. It is recommended to go for the most recent download of Java 7.
You may also use Scout with Java 6. However, be aware that the communicated end of life for Oracle’s Java 6 is February 2013.2 Java 5 is not supported. Running Scout on Java 8 is realistic for the 2014 release train of Eclipse. This guess is based on the Java SE Roadmap press release.3
On the Windows platform, we recommend to install the Oracle JDK 7 together with Scout. The reason for this recommendation is simple. Eclipse Scout is officially tested with the Oracle JDK 7 on Windows.
To successfully install the JDK you need to have at least local admin rights. You also need to know your hardware architecture in order to download the correct JDK installer. The steps necessary to determine your hardware architecture are described on Microsoft’s support site.4
Once you know your hardware architecture, go to Oracle’s official download site5 . There, click on the big Java download button and you will be shown the various Java SE Development Kit 7 Downloads. Accept the licence agreement by clicking on the appropriate radio button. Select the Windows x64 package if you are running 64-bit Windows as shown in Figure B.1. If you are running 32-bit Windows, go for the Windows x86 package. It is also recommended to download the Java SE 7 Documentation. The documentation package is also available from the official download site, located further down under section Additional Resources.
Once you have successfully downloaded the JDK installer follow the Windows installation guide6 . To verify the installation you might want to go through this Java ”Hello World!” tutorial7 .
Installing Eclipse Scout 3.9 requires a working JDK 6 or JDK 7 installation. If this is missing, see the previous section for installation instructions.
The download page should look as shown in Figure B.2. In this screenshot, the packages available for Eclipse Kepler (4.3) M4 are shown and Windows is preselected in the dropdown list. Should the download page show the wrong platform in the dropdown list, you will need to choose the correct one manually.
The following sections describe the installation steps depending on the operating system of your environment.
For Windows, the Eclipse download page offers two versions for each package. In Figure B.2, the links for these two versions are called Windows 32 Bit and Windows 64 Bit. To decide which version to download you first need to know if you have installed a 64-bit JDK or a 32-bit JDK and then download the corresponding Eclipse installation. Because this is important, let us be very explicit: If you are using a 64-bit JDK you must download the 64-bit version of the Eclipse Scout package. If you are using a 32-bit JDK you must download the 32-bit version of the Eclipse Scout package. Any other combination will simply not work.
If you just installed the JDK yourself you will remember what you have installed. In case you have a JDK pre-installed you can find out by typing java -version on your console. For 64-bit JDK installations this fact is explicitly mentioned in the text printed by this command. The output will then look similar to the one provided below.
If you have installed a 32-bit version this fact is not explicitly mentioned. See below for an example output of a 32-bit installation.
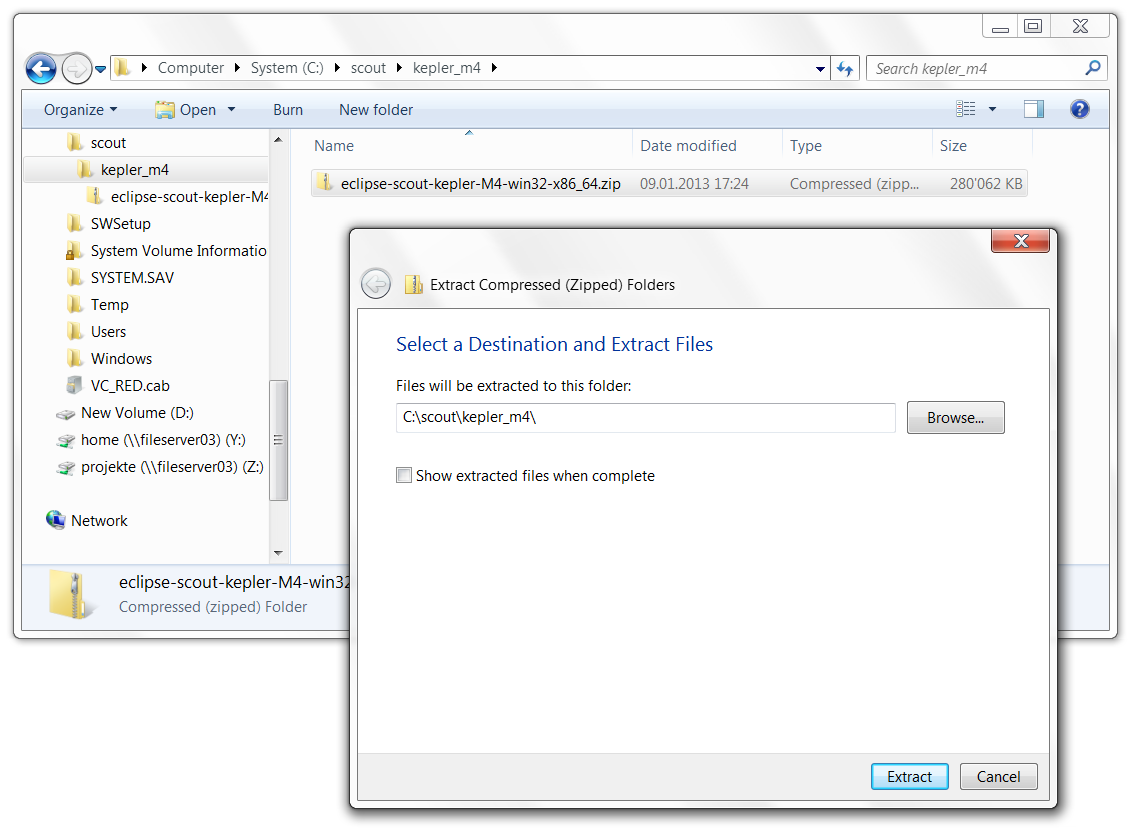
Now you know which version of the Eclipse Scout package to download. Installation of the Scout package does not require any administrative priviledges, unlike the JDK installation. As the package is a simple ZIP file, you may unpack its content to a location of your choice as shown in Figure B.3. If possible, we recommend a target directory such as C:\scout\kepler_m4. Such a target directory avoids two problems that we had to deal with in the past: path names including spaces, and very long path names that may break the functionality of your zip/unzip tool.
After unzipping the Scout package, navigate into the subfolder Eclipse. In case you have installed multiple JDKs coming with their individual Java Runtime Environments (JREs), you might want to explicitly specifiy which JRE to use. Open the file eclipse.ini in a editor of your choice and insert the following two lines at the top of the file:
where the second line specifies the exact path to the JRE to be used to start your Eclipse Scout installation. If you have only installed a single JDK you will not need to change the default eclipse.ini file of your Eclipse installation.
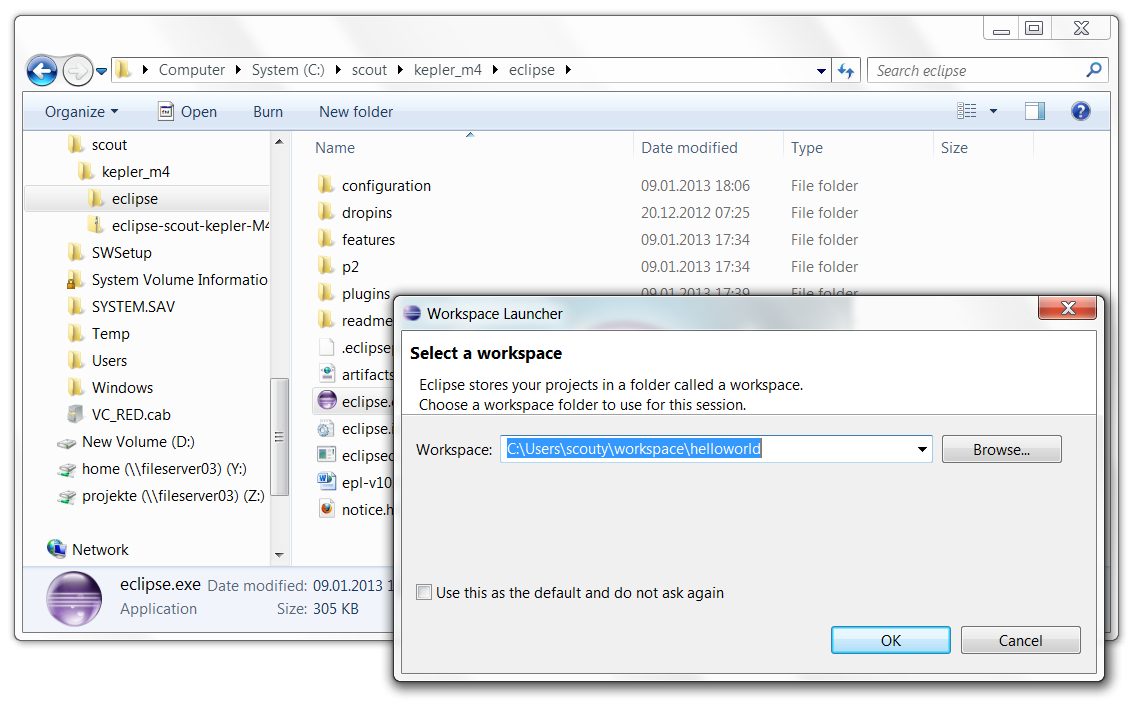
You are now ready to start Eclipse Scout via the eclipse.exe file. This brings up the workspace launcher as shown in Figure B.4. Into the Workspace field you enter the target directory of your Scout project. For a new project you can also enter a path to a directory that does not yet exist. After clicking the Ok button, Eclipse will create directories that do not yet exist and start the workspace from the specified location.
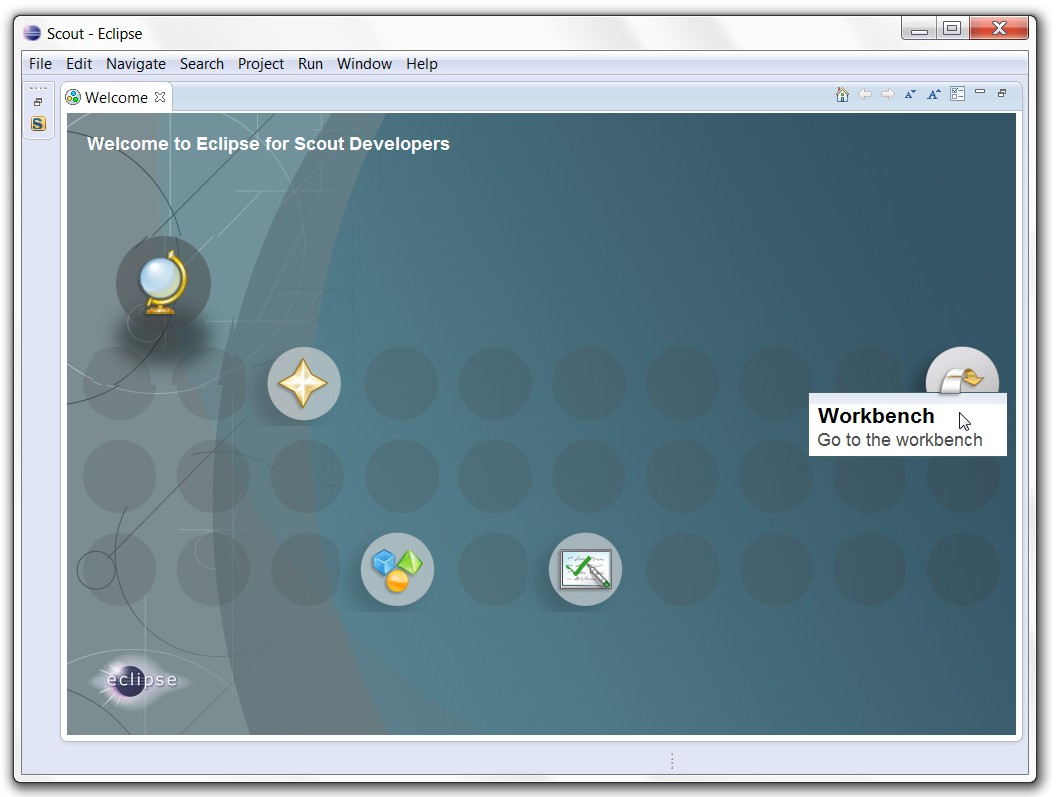
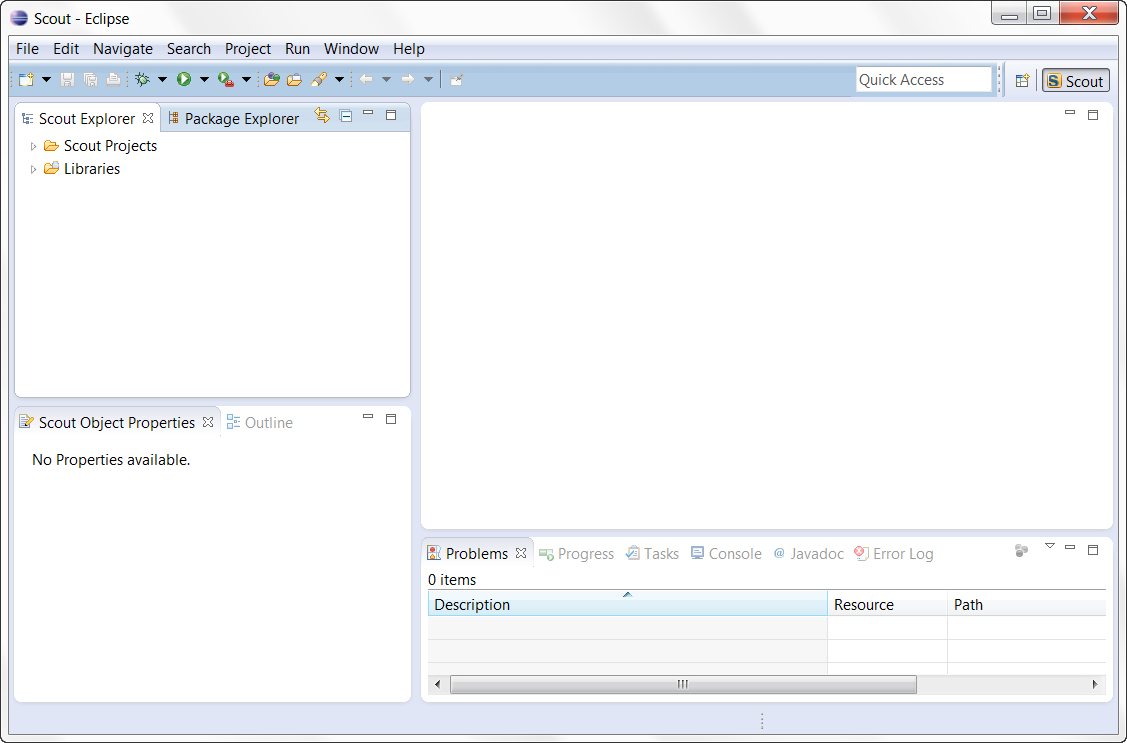
When opening a new workspace for the first time you will be shown the welcome screen as shown in Figure B.5. Click on the Workbench icon to open the Eclipse Scout perspective as shown in Figure B.6.
If you have explicitly specified the JRE to be used you verify this in the running Eclipse installation. Fist, select the Help—About Eclipse menu to open the about dialog. Then, click on the Installation Details button and switch to the Configuration tab. In the long list of system properties you will find lines similar to the ones shown below.
You have now successfully completed the Eclipse Scout installation on your Windows environment. With this running Scout installation you may skip the following section on how to add Scout to an existing Eclipse installation.
This section describes the installation of Scout into an existing Eclipse installation. As the audience of this section is assumed to be familiar with Eclipse, we do not describe how you got your Eclipse installation in the first place. For the provided screenshots we start from the popular package Eclipse IDE for Java EE Developers from the Juno release.
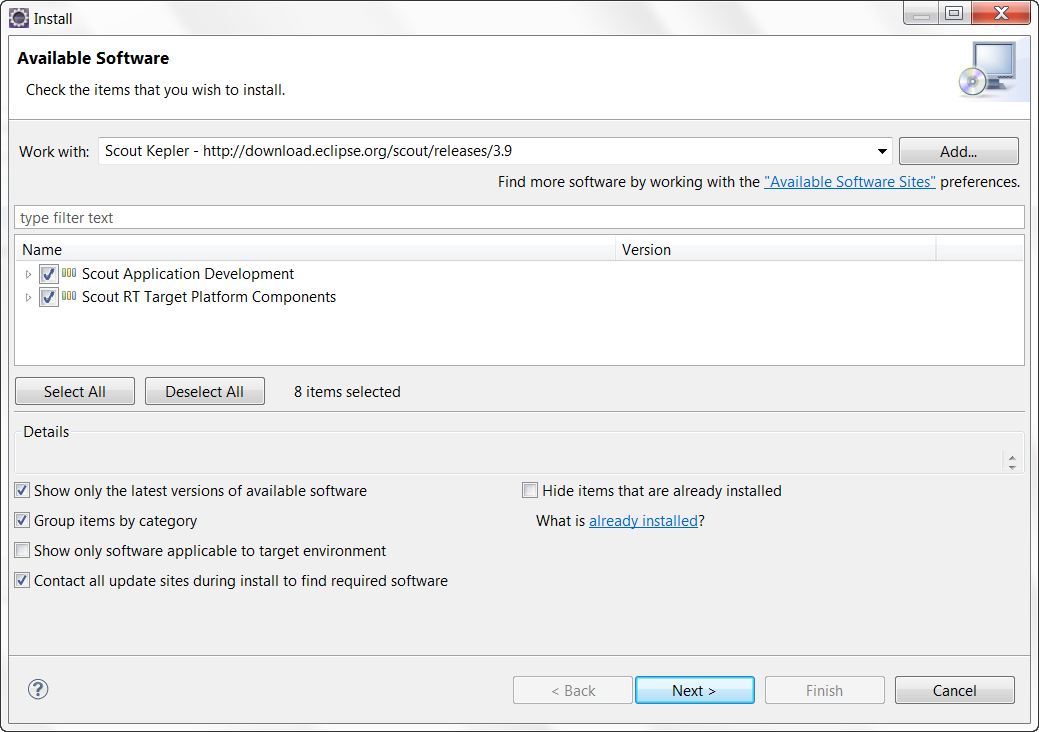
To add Scout to your existing Eclipse installation, you need to start Eclipse. Then select the Help—Install New Software... menu as shown in Figure B.7 to open the install dialog.
In the install dialog, click on the Add... button to enter the link to the Scout repository. This opens the popup dialog Add Repository As shown in Figure B.8 you may use ”Scout Kepler” for the Name field. For the Location field enter the Scout Kepler release repository as specified below. http://download.eclipse.org/scout/releases/3.9.
After connecting to the Scout Kepler repository you may both Scout features as shown in Figure B.9. Then, move through the installation with the Next button and accept the presented EPL terms. Currently, there is still unsigned content included in the features. So please click away the corresponding warning and accept the request for a restart of Eclipse. Finally, you may add the Scout perspective to end up at a state very similar to Figure B.6.
After you can start your Eclipse Scout package you need to verify that Scout is working as intended. The simplest way to verify your Scout installation is to create a ”Hello World” Scout project and run the corresponding Scout application as described in Chapter 2.